4 Drop-Shadow Techniques to Make Your Subjects Pop
Drop shadows might seem like a simple design element, but when used effectively, they can elevate your images from flat and lifeless to vibrant and dynamic. Whether you’re working on product photography, portraits, social media visuals, or graphic designs, mastering the art of shadowing can add visual depth, emphasize your subject, and direct the viewer’s eye exactly where you want it. In this article, we’ll explore four powerful drop-shadow techniques that not only make your subjects pop but also give your designs a professional edge.
1. Soft Natural Shadows for Realistic Depth
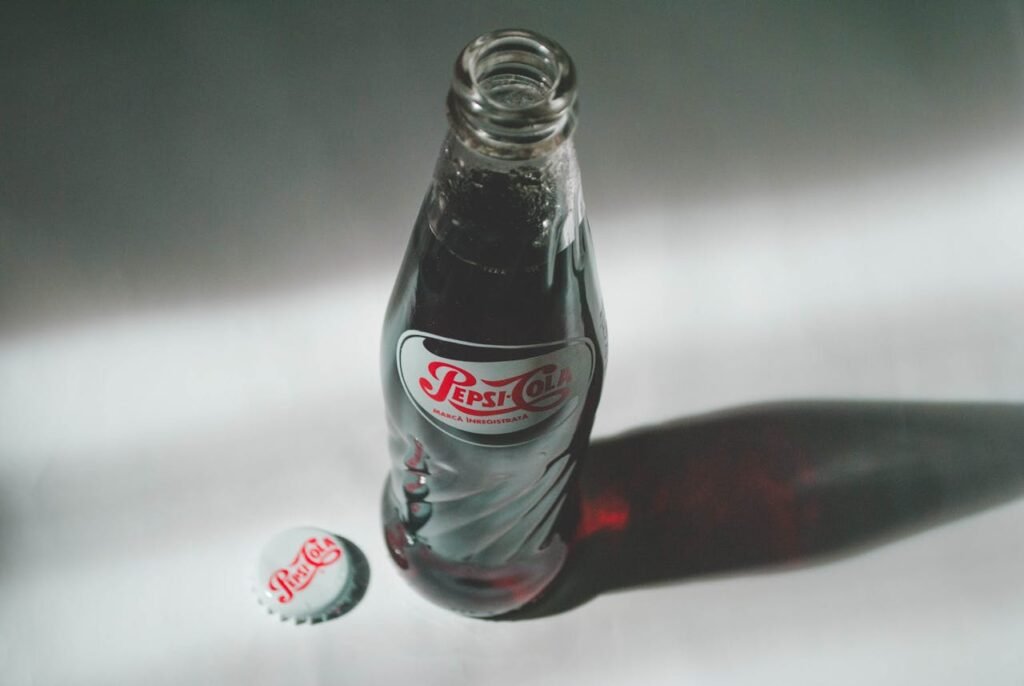
Natural-looking shadows are your go-to technique when you want your subject to appear as if it’s genuinely part of the scene rather than just pasted onto a background. This style mimics the way light behaves in real life and creates subtle gradients and falloff.
Why It Works: Soft shadows help ground the subject in the image, adding believability and spatial awareness without drawing too much attention to the effect itself.
How to Apply It:
- Use a soft, feathered brush in Photoshop or similar tools.
- Lower the opacity to around 30-50%.
- Position the shadow based on your light source.
- Add a Gaussian blur to soften edges and blend the shadow naturally.
Best Use Cases: Product mockups, lifestyle photography, branding visuals
Pro Tip: Duplicate your subject layer, fill it with black, then apply a Gaussian blur and reduce opacity. It’s a quick way to create a realistic shadow that matches your original object.
2. Hard Shadows for Bold, Graphic Designs
Hard shadows, in contrast to soft ones, have crisp edges and high opacity. They can make your designs feel more graphic, stylized, and dramatic—especially when paired with contrasting backgrounds or minimalist compositions.
Why It Works: This technique offers high contrast and clarity, often used to convey intensity, focus, or a bold brand aesthetic.
How to Apply It:
- Create a duplicate of your subject and turn it solid black.
- Rotate and offset the layer based on your imaginary light direction.
- Don’t blur—keep edges sharp.
- Adjust layer opacity slightly, if needed, but avoid over-softening.
Best Use Cases: Posters, album covers, social media graphics, editorial layouts
Pro Tip: Try using colored hard shadows (like pink, blue, or orange) for a trendy, modern design vibe. It adds playfulness and can tie into your brand palette.
3. Floating Shadows to Create 3D-Like Separation
Floating shadows create the illusion that the subject is hovering slightly above the background. This not only adds visual intrigue but also helps separate layers more distinctly.
Why It Works: Floating shadows add a feeling of elevation and lightness, making subjects appear interactive and alive.
How to Apply It:
- Place the shadow slightly below and to the side of the subject.
- Use moderate blur (5–15 px) and reduce opacity to around 40%.
- Increase the distance between shadow and subject to exaggerate the “lifted” effect.
Best Use Cases: UI/UX design mockups, sticker-like images, profile pictures, portfolio shots
Pro Tip: Combine floating shadows with subtle animations (like scaling or bouncing) in web design to enhance interactivity.
4. Layered Multi-Directional Shadows for High Drama
This advanced technique involves adding multiple shadows with different angles and opacities to simulate complex lighting or dramatic studio setups. It’s perfect for making your subject really stand out in busy or textured backgrounds.
Why It Works: Multiple shadows suggest movement, dynamic lighting, and visual layering. It’s especially effective in high-concept or fashion-forward designs.
How to Apply It:
- Create two or more shadow layers.
- Offset each in a different direction (e.g., one to the bottom-right, another top-left).
- Use varying opacities (20%–60%) and blurs for depth.
- Experiment with color shadows for an editorial effect.
Best Use Cases: Fashion photoshoots, creative ads, music visuals, experimental art
Pro Tip: Try pairing a hard shadow with a soft one—this contrast can emphasize shape while adding realism.
Drop Shadow Techniques Comparison Table
| Technique | Look & Feel | Best For | Difficulty Level |
|---|---|---|---|
| Soft Natural Shadow | Realistic & Subtle | Product photos, lifestyle shots | Easy |
| Hard Shadow | Bold & Stylized | Posters, social media posts | Medium |
| Floating Shadow | Light & Interactive | UI design, web visuals | Medium |
| Multi-Directional Shadow | Dramatic & Complex | Fashion, editorial, artistic work | Advanced |
FAQs About Drop-Shadow Techniques
1. Which shadow technique is best for e-commerce product photos?
Soft natural shadows work best because they enhance realism and make the product look grounded without distracting viewers.
2. Can I use drop shadows in mobile app UI?
Yes, floating or soft shadows work great in UI/UX design to separate elements like buttons, cards, or modals from the background.
3. How can I make shadows look consistent across images?
Always establish a light source and stick to it. Keep shadow angles, blur radius, and opacity uniform across your visuals.
4. Are colored shadows good for branding?
Definitely. Colored shadows can add a fun or premium touch and help reinforce brand colors. Just use them sparingly.
5. What’s the difference between drop shadows and cast shadows?
Drop shadows are digital effects added behind elements, often in 2D graphics. Cast shadows replicate real-world shadowing from light sources and can be more complex.
6. Can I animate drop shadows?
Yes! In tools like After Effects or CSS, you can animate shadow opacity, distance, and blur to create dynamic effects in motion design.
Conclusion
Drop shadows are more than just visual embellishments—they’re essential tools in a designer’s kit that bring images to life. Whether you’re aiming for realism, style, drama, or interactivity, the right drop-shadow technique can dramatically transform how your subject is perceived. Try out these four methods and see how even a subtle shift in shadow can make your work feel bolder, cleaner, and more professional.
Try This Tool: Add Drop Shadows Instantly
Want to add stunning drop shadows without fuss? Use Pixfav’s Drop Shadow Generator to apply customizable shadows to your images in seconds—no Photoshop required!

